Wait Lists
For most undergraduate courses, you will have the option of placing yourself on a waitlist when a course section has no available seats. There are certain exceptions, like Faculty of Education courses do not have a waitlist option, nor do laboratory (i.e., lab) sections, CRS practicum courses, or directed reading courses. Generally, if there is no waitlist button the course does not have a waitlist option.
Here are the basics of managing a waitlist. Please click on the relevant section:
- How to waitlist in a course section
- What to do when a seat becomes available
- What to do after classes start
You may also want to view the instructional video: Student Planning 6 - Waitlists
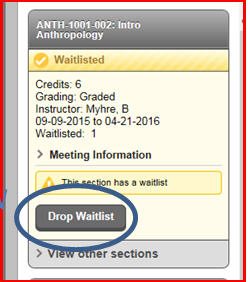
Students are able to remove themselves from a waitlisted course section at any time in WebAdvisor by clicking on the Drop Waitlist button.
Note: Check your University Webmail on a daily basis. You have up to 3 days to claim your reserved seat in the waitlisted course section. You don't want to miss out!
If you place your name on the waitlist, it is your responsibility to monitor your rank or placement. This is done in the Plan & Schedule screen of WebAdvisor.
How to Waitlist in a Course Section
Starting from the Course Catalog in the Student Planning tab, once a course section reaches its maximum seating capacity, the column on the left will change from Seats to Waitlisted.
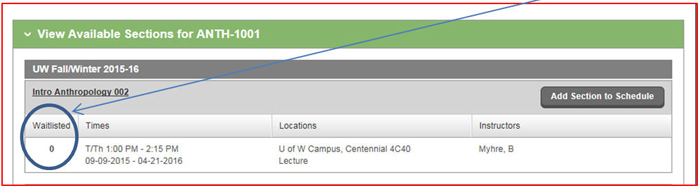
The above course has reached its maximum seating capacity and a waitlist has started (although no one is on the waitlist at this time).
Click Add Section to Schedule to display the Section Details screen. This will also show the seats available as well as the waitlisted status. Click the Add Section to Schedule button again to continue. At the top right part of the screen you will see that it has been placed on your schedule.
Click Plan & Schedule and move the left or right arrow to go to the term where your course section is planned. Click the Waitlist button. Please see below.
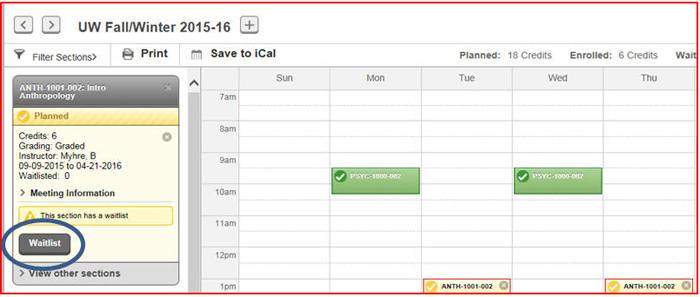
You are now on the course waitlist. The Waitlist button changes to a Drop Waitlist button.
In order to maximize the benefit of the wait list system for everyone, students should not request to be on a waitlist unless they truly want that course for their degree program. Students are able to remove themselves from a waitlisted course at any time in WebAdvisor/Student Planning.
Note: Check your University Webmail and Manage My Waitlist on a daily basis. You have 3 days (or 72 hours) to claim your reserved seat in the waitlisted course section. You don't want to miss out!
If you place your name on the waitlist, it is your responsibility to monitor your rank or placement. This is done in Manage My Waitlist (please see the Manage My Waitlist section below).
What to do When a Seat Becomes Available
How to Register in a Course Section off the Waitlist - NO LAB
Note: You can only register when a seat becomes available and you have received an email notification allowing you to register.
To register, log into WebAdvisor, select Student Planning and wait for your program data to load, and then click on Plan & Schedule. Click the arrow to the left or the right to find the term where the waitlisted course is planned. If necessary, you may need to scroll down to find the waitlisted course on this screen.
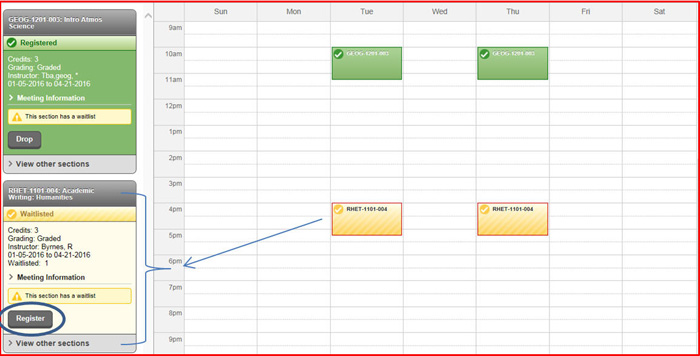
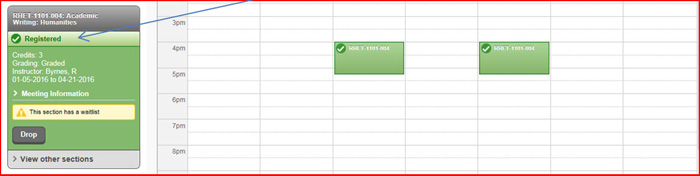
Once you have found the waitlisted course section, click the Register button. Read and Accept the University’s legal statement. Once it has completed processing you will see the box has changed to green and a checkmark is beside “Registered.”
How to Register in a Course Section off the Waitlist – WITH A LAB
First, make sure you have the lab section already planned on your timetable before you try to register.
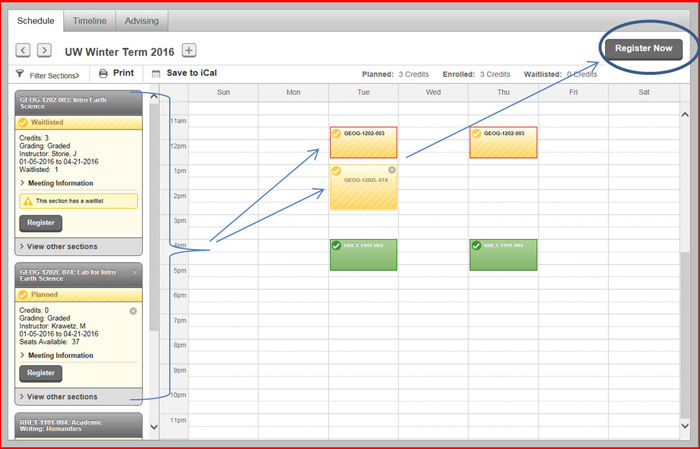
When a seat becomes available, you will receive an email notification in your Webmail account identifying the course section and term that you can register. You have up to three days in which to register for both the lecture and the lab together. In Plan & Schedule, both the course section and the lab section will have a Register button. Do not try to register with these. Instead, click the Register Now button on the top, right-hand corner of the page to register the course section and register the lab section at the same time.
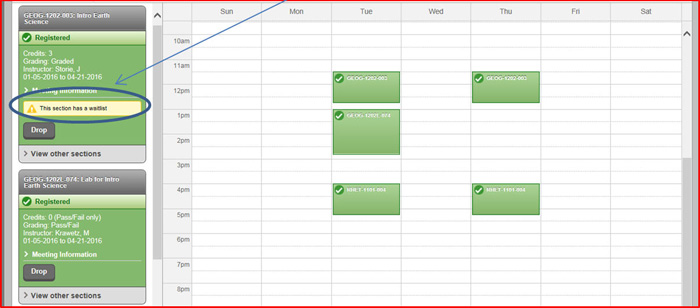
They must be registered together because the lab section is considered a co-requisite to the lecture section. Upon being successfully registered in both the lecture and the lab you will see the waitlisted course section and the lab section boxes have changed to green and a checkmark is beside “Registered”.
Lab sections are a co-requisite to lecture sections, but there are several other courses, too, that can be a co-requisite to a course section. For example, Introduction to Calculus 1 and 2 (MATH-1103 and MATH-1104) are a co-requisites to Foundations of Physics (PHYS-1101). Both these courses require a lab section and must be planned on your schedule in order to register successfully off the waitlist.
Note: Student Planning will let you know that the last seat in a course section has been taken – please see the following screenshot.
What to do After Classes Start
After classes have started, if you are still on a waitlist for your preferred course section, you should continue to check your webmail account daily for permission to register off of the waitlist. (NOTE: Professors do not hand out permission slips.)
IF a space becomes available during the Course Add/Drop Period, you will receive an email letting you know that you can register through WebAdvisor. The Drop Waitlist Button will have a Register beside it button. Register immediately! (Or drop yourself from that waitlist.)
Only students registered in a course on WebAdvisor will have access to the course materials and/or (recorded) lectures on Nexus. Nexus access will be given on the next business day after registering. Students waitlisted for a course will not have Nexus access to it. Only students registered in a course on WebAdvisor are permitted into the classroom for an in-person class. Students waitlisted for a course are not allowed to attend the lectures.
Being on a waitlist for a course section does not mean that you will be given permission to register in it. Students are only admitted from the waitlist if there is space available in the section before the end of the Add/Drop Period.
The last day to register in a given class is the last day in which to receive a refund for it - please see Withdrawal Schedules. The waitlist will run for the last time on each course’s refund-eligible date so students who receive permission on the second-last or last day only have those day(s) in which to register, not the regular three-day period. NOTE: Consider whether it is advisable to register in the course for which you have received permission. How far into the course is it? Do you have the time and ability to catch up? Did you miss any potential marks already?
Once registered, you are expected to pay for your classes on or before the payment deadline for that term. Please see Payment Deadlines. This date is not the refund date of a course. Check the Withdrawal Schedules for the refund-eligible dates and voluntary-withdrawal (no refund) dates for each course. If you register for a course after the payment deadline (only permitted in the most exceptional circumstances), your fees are due within 24 hours of registering.